Monday, January 31, 2022

Dig Out Layout

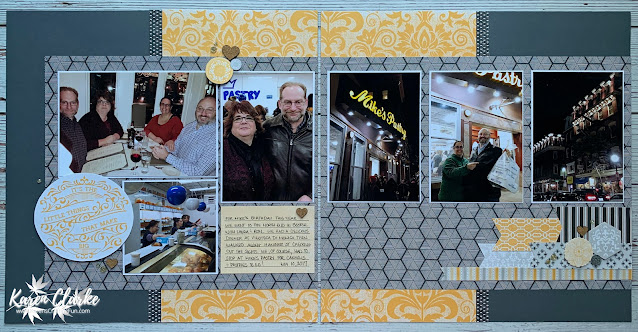
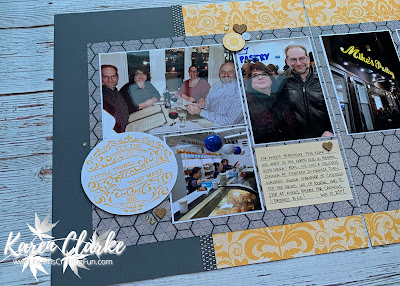
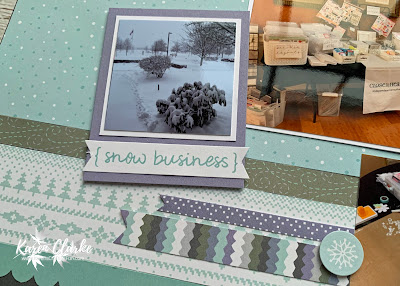
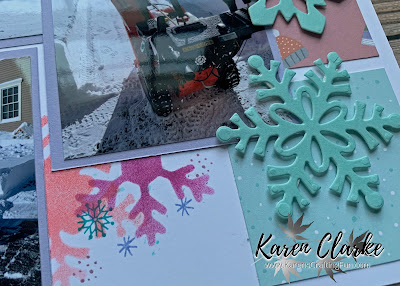
 We had a winter storm here in Massachusetts last weekend and got about 15" of snow. I knew as soon as I was taking the pictures that I wanted to use some of the Wonderland Collection to scrapbook them. I finished this layout during today's Scrapbook with me event using up some of my scraps from this collection.


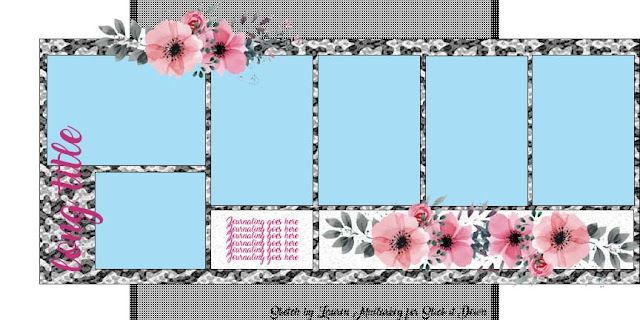
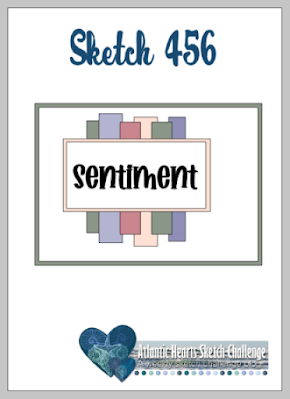
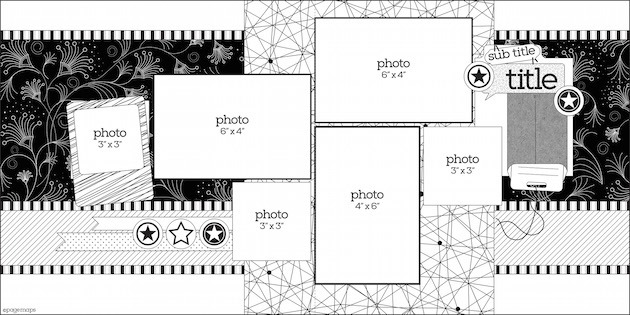
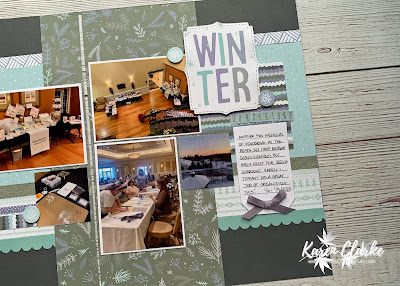
The inspiration for this layout comes from this sketch from EvenMoreScrapping. You can see this sketch along with others here.


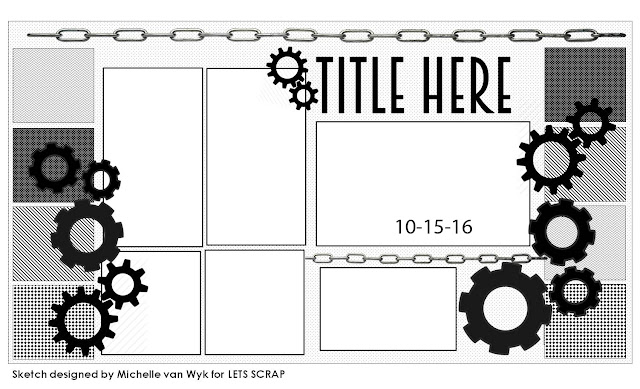
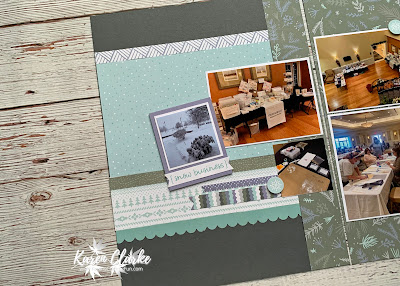
I am continuing with modifying the 12x12 sketches for 8 1/2x11 for my layouts from 2022. I also decided to do a 1-page layout with this page instead of a 2-page layout.

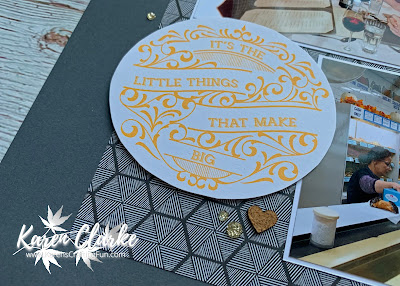
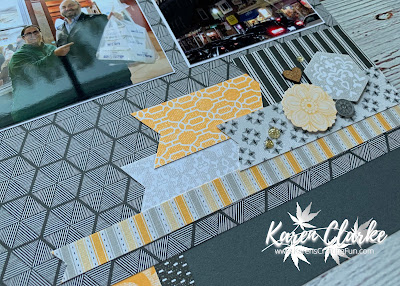
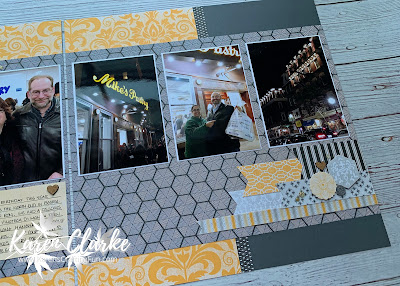
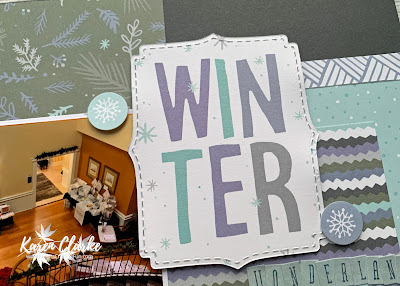
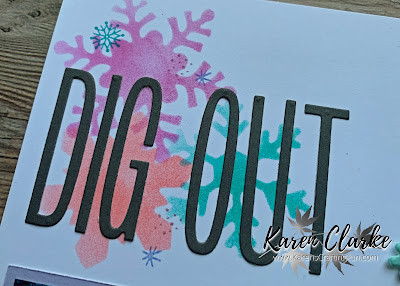
I used Distress Oxide Inks along with stencils I made from the Winter Flurries Thin Cuts set. I just some heavyweight stencil film using the dies and then using the Blending tool added some sponged snowflakes to the background. I also stamped some smaller snowflakes and splatters from the Wonderland Cardmaking stamp set. The title was die cut using the Slim Alphabet Thin Cuts set.


If you are interested in joining me for one of my Scrapbook with me events make sure to Like and Follow my Facebook page to get notifications for upcoming events.

I hope you like the layout. Thanks for stopping by!

Supplies:

X7274S - Wonderland Paper Pack + Sticker Sheet
Z4337 - Wonderland Cardmaking Stamp Set + Thin Cuts
1385 - White Daisy Cardstock
X6032 - Wisteria Cardstock
X5953 - Charcoal Cardstock
Z4334 - Slim Alphabet Thin Cuts
Z3835 - Seedless Preserves Distress Oxide Ink
Z3833 - Peacock Feathers Distress Oxide Ink
Z3825 - Abandoned Coral Distress Oxide Ink
Z3886 - Mini Ink Blending Tool


Wednesday, January 26, 2022

Celebrating Mike layout

I had a fun time during today's Scrapbook with me event. I enjoyed creating this layout for my husband, Mike's, birthday dinner out from 2017. I knew when I saw these pictures I wanted to use the Sweet as Honey Collection for this layout.


The inspiration for this layout comes from this sketch from the StickItDown blog. You can see this sketch along with others here.


For the title I cut this out from a Picture My Life Card. I used some scraps of paper as well as some strips cut from Picture My Life Cards for the banners on the right hand page. I added some stickers and cork shapes as well as some glitter gems to finish off the layout.


If you are interested in joining me for one of my Scrapbook with me events, please Like and Follow my Facebook page to get notifications for upcoming events.

You can see and shop the Sweet as Honey Collection here on my website today.

I hope you like the layout. Thanks for stopping by!

Monday, January 24, 2022

Valentine's Cards and a Sketch Challenge

 It's getting close to Valentine's Day and I could not wait to make some fun Valentine's cards using the Smitten Collection from Close To My Heart. I had already used the collection on some Valentine's Treat Bags and a scrapbook layout so I worked with the scraps I had leftover for these cards.


The cards were based on this sketch from Atlantic Hearts Sketch Challenge. You can see this sketch along with others here.

I started with cutting the scraps into strips of various widths and lengths, then played with the layout of the strips on each card. I die cut some of the images from the Smitten stamp set. I stamped them in Intense Black Exclusive Inks and colored them in using the Triblend Markers.


These cards were so much fun to put together and I can see using this sketch many times as it is a great one for using up paper scraps.

I hope you liked the cards. Thanks for stopping by!

Supplies:

CC12218 - Smitten Paper Pack
CC12219 - Smitten Coordinating Cardstock
CC122111 - Smitten Stamp Set + Thin Cuts
Triblend Markers

Sunday, January 16, 2022

Sweet As Honey OSW Card Workshop

I am in love with the first collection in the January/February catalog from Close To My Heart. The Sweet As Honey collection features tones of yellow, grey and black and features some patterns that I can see using for many crafting projects. I have already done a couple of layouts with this collection but could not wait to work on a One Sheet Wonder Card Workshop with this. I am so happy with how this came out. This workshop helps you make 12 cards to send to some sweet wishes family and friends.


This workshop creates 12 cards from the 1 sheet of patterned paper plus 5 sheets of cardstock.  This is the cutting diagram for the patterned paper.


The stamped images and sentiments come from the Sweet As Honey Cardmaking Stamp Set + Thin Cuts. I had fun stamping the floral field image on for the various cards. I stamped these in Intense Black Exclusive Ink and then colored the flowers in the Gold Yellow Blend Triblend Marker and the leaves in the Citrus Green Blend Triblend Marker.

These are the 12 card designs you will be able to create with this workshop.


If you are interested in creating this workshop for yourself or with your customers, there are 4 ways to get the files:

1. Follow the Buy Now link on the bottom of this post. The files are $11.50 (USD). 

2. Place a purchase on my Close To My Heart website for $35 or more (before taxes and shipping).

3. Join the VIP Program from Close To My Heart under me. All my VIPS get FREE access to my workshop files.

4. Join my Close To My Heart team, all team members have access to my workshop files.

Supplies Needed for this Workshop:

    X7276B - Sweet As Honey Paper Pack
    X7276C - Sweet As Honey Coordinating Cardstock
    1385 - White Daisy Cardstock
    Z4403 - Sweet As Honey Cardmaking Stamp Set + Thin Cuts
    X254 - White Cards & Envelopes Value Pack
    Z3943 - Circles Thin Cuts
    Z4189 - Intense Black Exclusive Ink
    Z2519 - Gold Yellow Blend Triblend Marker
    Z2484 - Citrus Green Triblend Marker
    Z3312 - Gold Glitter Gems

Here is what you will receive with the workshop files:
  • Welcome Page 
  • Cutting Guide with color photos of the papers and directions for cutting the papers needed
  • Card Guide with supply list and color photos of the completed cards
  • Maker Release
  • Social Media image for you to use in promoting the workshop for your customers

I hope you enjoy creating these cards just as much as I did creating them! 

...


Saturday, January 15, 2022

Valentine's Treat Bag and a Tutorial

It's very cold outside today so I am keeping warm in my craft room and had fun creating this treat bag for Valentine's Day featuring the Smitten Collection from Close To My Heart. I cannot wait to fill some bags with candy and other treats for my friends and coworkers this Valentine's Day!

The treat bag uses cardstock for the base and patterned paper for embellishments. I also stamped some fun images to add to the front of the bag. I have included a link to a PDF of instructions at the end of this post as well as a process video.

To create this treat box you will need 2 pieces of cardstock and 1 piece of patterned paper.  From the cardstock you will need to cut 2 larger hearts that are about 6" at the widest point, 1 strip that is 1" x 12" and then a 6" x 8" piece. From the patterned paper you will need 2 hearts that are about 5 3/4" at the widest point.


If you have a Cricut I have created a shared Design Space file so you can cut the hearts and score and cut the box base. You can access the file here. The file uses images that are free in Design Studio. If you use the Cricut you can skip the next step to go to the assembly of the box. The only piece not included is the 1" x 12" strip for the handle.

If you do not have a Cricut you can use a 12" trimmer with scoring blade or a scoring platform to score and cut the 6" x 8" piece according to the following diagram.
  1. Score the 2" square in the box base by - On the 8" side score at 2" from 3" to 5", rotate 90 degrees and on the 6" side score at 3" from 2" to 4". Rotate another 90 degrees and repeat the scoring to finish the box.
  2. On the 6" side cut at 2" to the corner of the scored box. At 4" and repeat cut to the box corner. Rotate 180 degrees and repeat the cuts on the opposite 6" side.
  3. On the 8" side cut at 7/8" to the 2" cut line. At 7 1/8" cut to the 2" line. Rotate 180 degrees and repeat the cuts on the opposite 8" side. This will cut out the greyed out areas.
  4. Score each corner from the tip to the corner of the scored box. This will create triangular tabs for the assembly process. Fold along scored lines.  
When you are done scoring and cutting the box base piece will look as follows.


Place strong adhesive on the outside of the box base piece on the triangular tabs as shown.


Remove the adhesive backing and tuck the triangular tabs inside. You will end up with a "boat-like" box base. Place adhesive on the back of both ends of the handle strip and adhere to the outside of the box base.


Place strong adhesive on the back of the patterned paper hearts and the scalloped hearts. For the scalloped hearts place one strip vertically along the center to adhere it to the handle. Do not place adhesive higher than 1 3/4" up from the bottom to keep it from showing.  Adhere the patterned paper heart to the front of the scalloped heart.


Adhere each scalloped heart to the side of the box base tucking some of it under the box bottom. You can also just trim the excess off.


Add some stamped elements and gems to embellish. Fill with candy or gifts and share for a fun Valentine's Day treat. I hope you have fun with this! You can see and shop the Smitten Collection on my website today here.

You can download the PDF of instructions here.  This process video walks you through the steps as well.


I hope you like the treat bag. Thanks for stopping by!


Friday, January 14, 2022

Winter Wonderland

Sharing one of my recent Scrapbook with me event layouts. This is the second layout I have done with converting a 12" x 12" sketch into 8 1/2" x 11" for my 2022 album. With this I actually scrapbooked pictures I took the weekend before! I had so much fun using the Wonderland Collection for this layout. This layout if for a weekend scrapbooking retreat I was a vendor at ironically titled Ready, Set, Crop Winter Wonderland Weekend.


The inspiration for this layout came from this sketch from Page Maps. You can see this sketch along with others here.


I used the Stitched Fancy Brackets Thin Cuts to die cut the title block from a Picture My Life Card and the Tags and Tabs Thin Cuts to die cut my journaling tag. I added some additional patterns in the banner strips and under the title block using the coordinating patterns that are in the Picture My Life Cards. I love using these cards things other than pocket scrapbooking.


If you are interested in joining me for one of my events make sure to Like and Follow my Facebook Page to get notifications for upcoming events.

I hope you like the layout. Thanks for stopping by!


Sunday, January 9, 2022

Besties

Sharing another workshop layout with you today. I created this Besties layout to document the wonderful relationship my daughters have. It features the new Sawyer Collection from the January/February Closse To My Heart catalog.


As I did with the My Honey layout I shared the other day I changed up the following Close To My Heart Workshop layout a bit to add some digital cut files and some stamped flourishes.

I love that I can take these workshop designs that are available to me and change them up for when I do a workshop class. I added a little extra to the digital cut images in that I sponged them with some coordinating ink colors.


I really love having the digital art collections available to coordinate with each catalog collection as it really helps stretch the crafting I do with each. Here are the images available in the Sawyer Digital Art Collection.

You can see and shop all of the components of the Sawyer Collection here on my website.

I hope you like the layout. Thanks for stopping by!