Today I am sharing some of the recent layouts I have done from our Rhine River trip album. I have continued to work on these layouts during recent Scrapbook with me events. I am still working with the Hope & Kindness Collection for the layouts in this album. I love being able to create a trip album from a single collection to give a unified look and feel to the layouts in it.
After each layout I am also sharing the sketches I used as inspiration for the layout along with links to where you can find the sketches.
If you are interested in joining me for one of my Scrapbook with me events make sure to Like and Follow my Facebook Page to get notifications on upcoming events.
I hope you like the layouts. Thanks for stopping by!
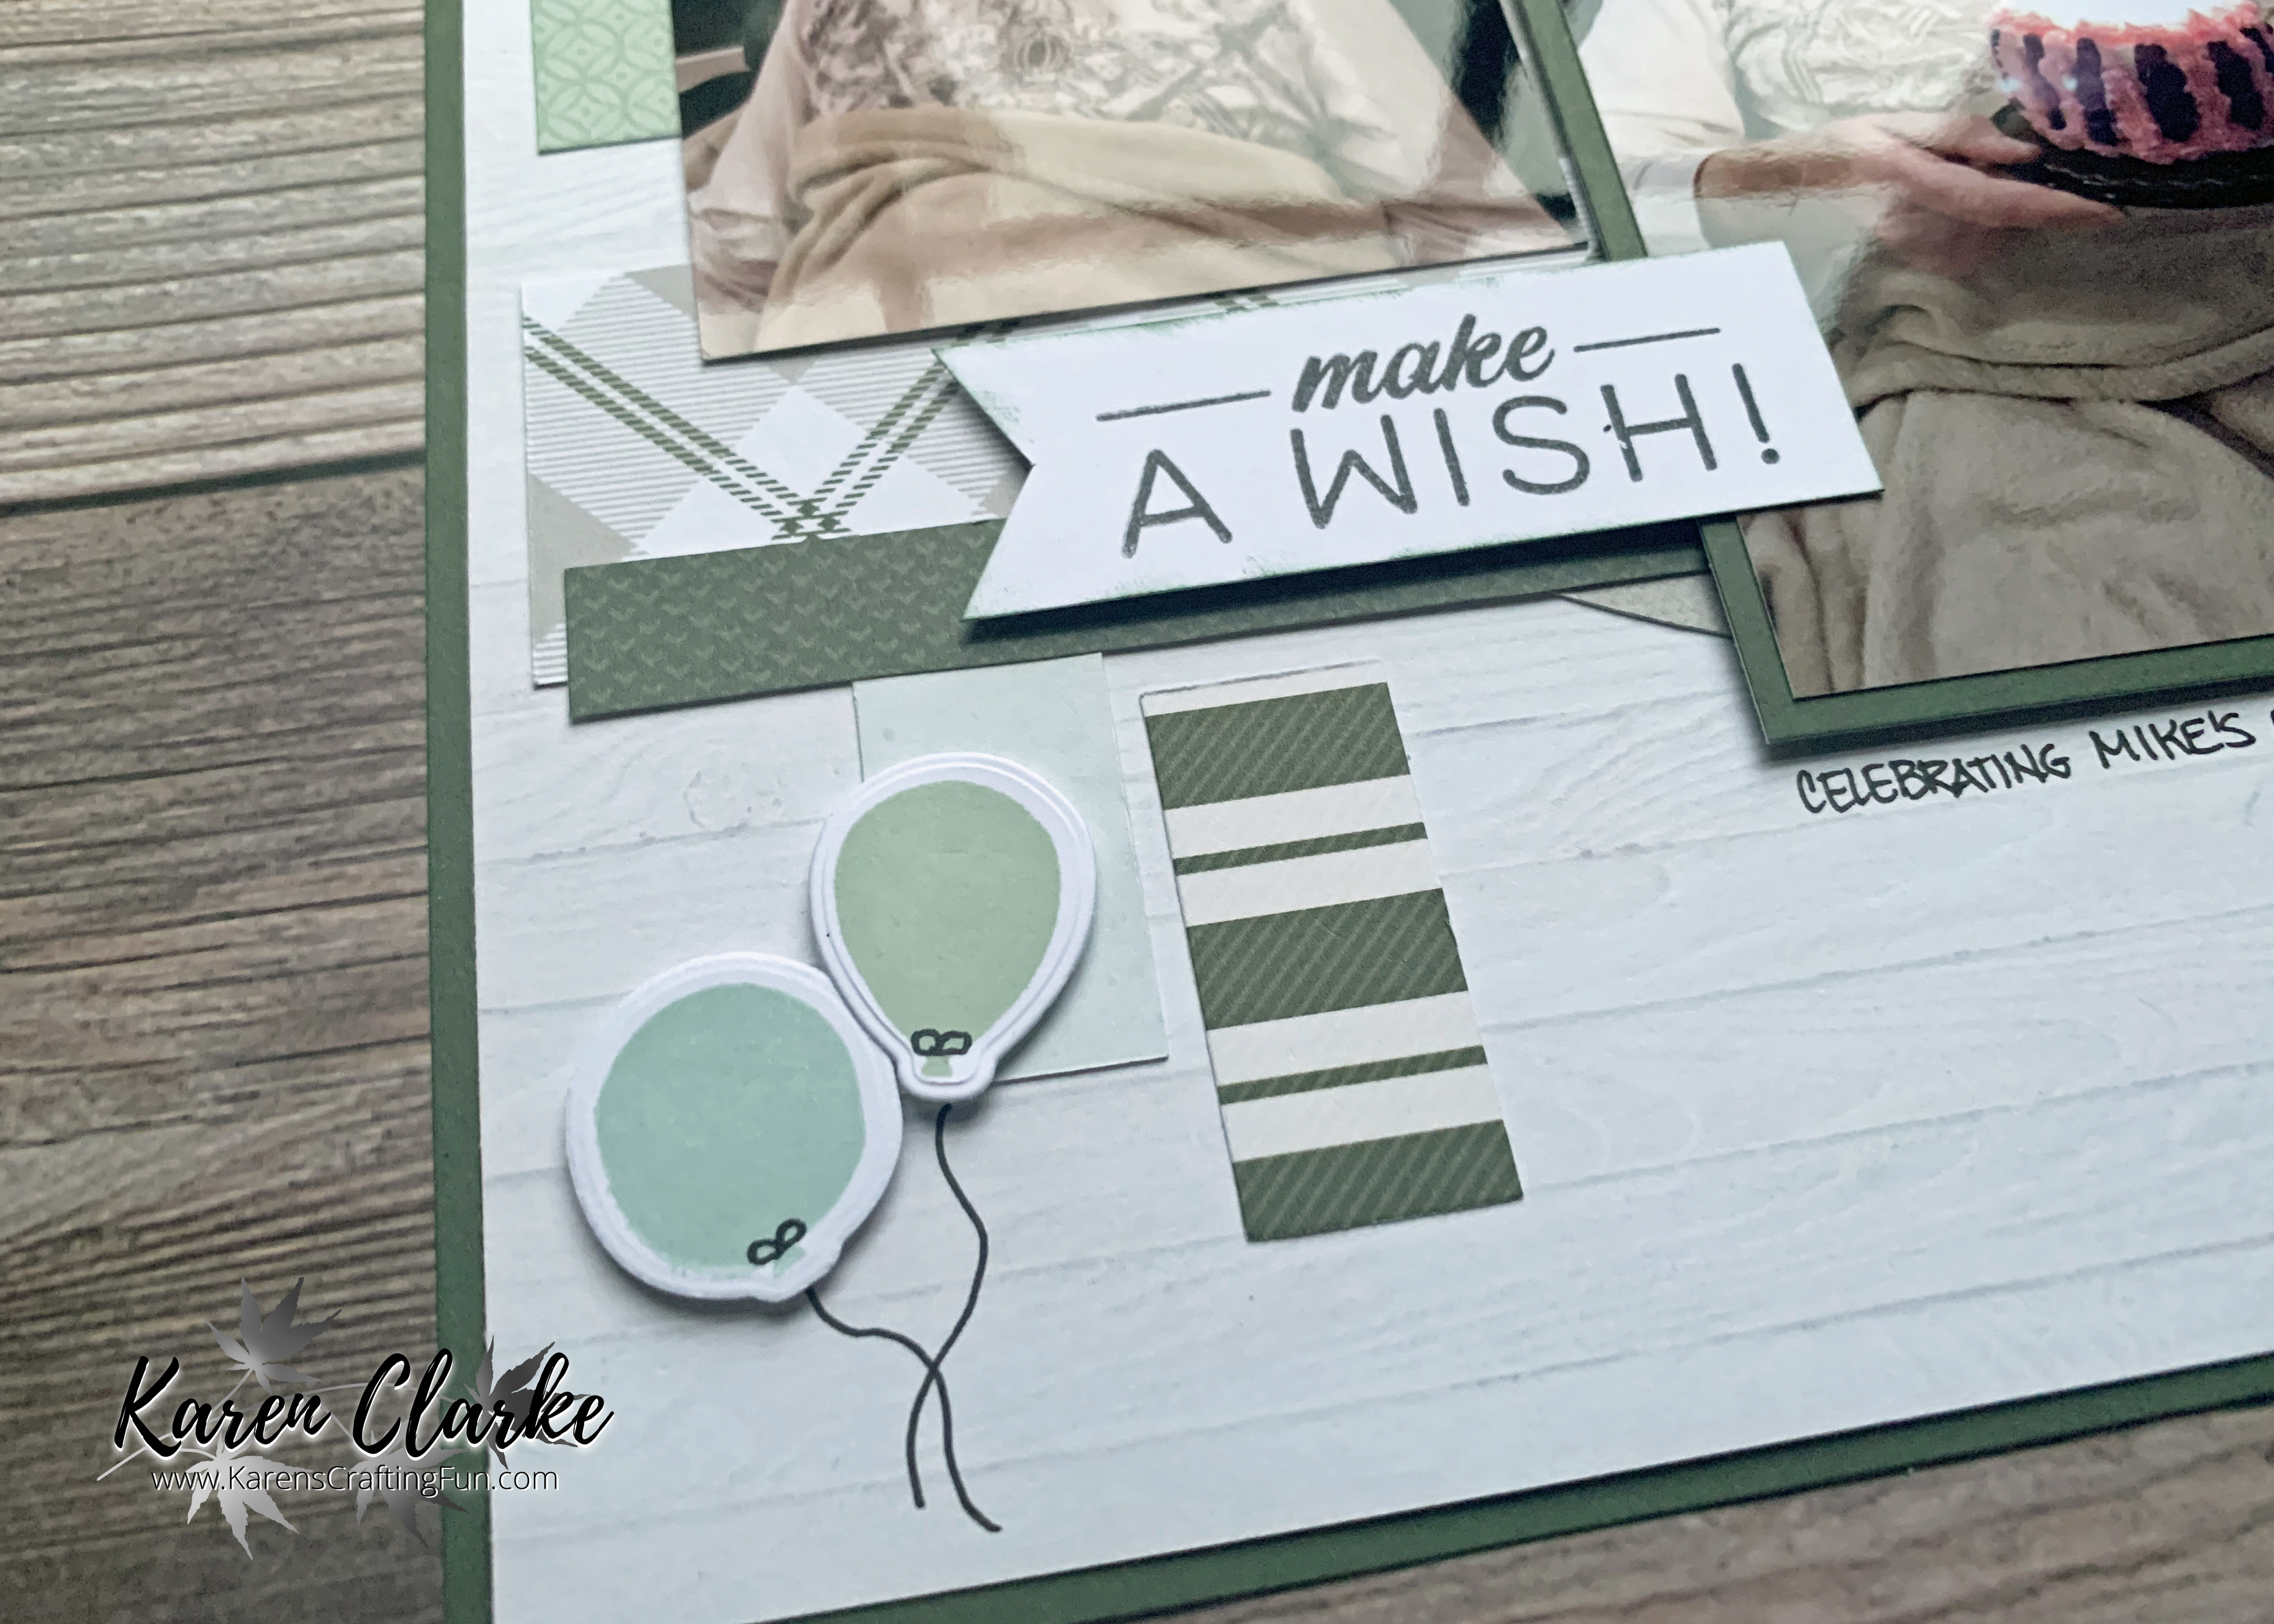
I created this layout during yesterday's Scrapbook with me event for my husband, Mike's, recent birthday. I worked with a combination of papers from the October-December Mix-In Paper Pack and the Four Seasons Winter Paper Pack. I love how well these papers work together.
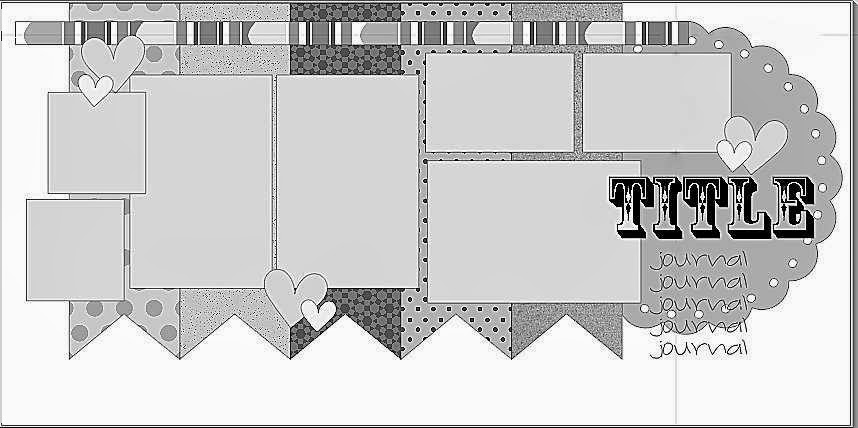
The inspiration for this layout comes from this sketch from Scrap Savvy. You can see this sketch along with others here.
I converted this 12" x 12" sketch to an 8 1/2" x 11" layout to work with our 2022 family album. I pulled out a retired stamp set from my stash - Cake Day Cardmaking Stamp Set. I used this for the title, banner and balloon embellishments. I curved the title stamps along the top of the circle before putting them on the block. I stamped both the title and banner sentiment in Intense Black Exclusive Ink. The balloons were stamped in Seabrook, Sage, and Pine Exclusive Inks. I used 3-D Foam tape to raise up the focal photo and the balloons to add some dimension. I hand drew the balloon strings using a black pen.
If you are interested in joining me for one of my Scrapbook with me events make sure to Like and Follow my Facebook Page to get notifications on upcoming events.
I hope you like the layout. Thanks for stopping by!
I completed this layout for our family album during Monday's Scrapbook with me event. As my kids are grown I do not have too many pictures of them at Halloween so being able to scrapbook the fun at my workplace (where my older daughter also works) is great. For this layout I used what I had leftover from the Fa-BOO-lous Collection after my Halloween crafting. I loved working with the different colors for these Halloween photos.
The inspiration for this layout comes from this sketch from Stick It Down. You can see this sketch along with others here.
I converted this 12" x 12" 2-page sketch into an 8 1/2" x 11" 2-page layout in keeping with the format I am using for our 2022 family album. I used a circle template along with a corner rounder to create the large scallop circle. I moved the journaling to the left-hand page. I used stickers from the Fa-BOO-lous collection along with some Melon Dots to embellish the page. I added some faux-stitching with a White Gel Pen to accent the scalloped circle.
If you are interested in joining me for one of my Scrapbook with me events make sure to Like and Follow my Facebook Page to get notifications on upcoming events.
I hope you like the layout. Thanks for stopping by!
Came up with a fun Christmas craft project recently and am sharing the results here with you today. I got inspired to make these Christmas Tree Treat Holders to be able to give some holiday goodies to my coworkers and friends. The treat holder can be used to give candy, a gift card or even put a tea light in to add to your holiday decor.
The treat holder uses 2 pieces of 12" x 12" cardstock, strong adhesive tape, circle cutters and fringe scissors to make it. I have included some variations to show how this can be made in different ways.
I am including a link to a downloadable PDF of instructions for this treat holder as well as a process video for it at the end of this blog post. The PDF contains pictures of the steps along with a link to a Cricut Design Studio file that is an optional way for cutting your paper.
Step 1: From the first piece of 12" x 12" cardstock cut an 11 1/4" circle. Cut this circle in 1/2. From one half-circle cut out a 6 1/4" half-circle and then cut a 3" circle from that.
Step 2: From the half-circle rin, score about 1/2" in from the outer edge and then cut notches below the score line. Fold along the score line.
Step 3: From the other piece of 12" x 12" cardstock cut another 11 1/4" circle. From this circle cut an 8 3/4" circle to create the first ring. From the 8 3/4" circle cut a 6 1/4" circle to form the second ring. Use the fringe scissors to cut around the outer edge of each ring, leaving 1/4" uncut along the inner edge.
Step 4: Apply strong adhesive to one side of a 3" wood circle. I used these to add stability to the base of the tree. Apply strong adhesive to one end of the front of the notched half ring. Remove the backing from the adhesive on the wood circle and half ring and working your way around adhere the notched tabs to the underside of the circle. Cut off the extra from the base once you have reached the end.
Step 5: Apply adhesive to one side of the 3" cardstock circle and adhere this to the bottom of the cone base to cover the notched tabs.
Step 6: With the cone base on a flat surface wrap the cardstock half-circle snuggly around the cone base. This helps to start to form the tree cone. Unwind this and apply strong adhesive to one half of the half-circle diameter. Again tightly wrap the half-circle around the cone base and with the adhesive secure the end.
Step 7: Apply strong adhesive to the back side of each fringed ring. Starting with the larger ring, remove the adhesive backing and beginning at the base of the cone, adhere the ring while working your way around and up the sides of the cone. Make sure to cover the 1/4" un-fringed portion of the ring as you work your way around. Follow the larger ring with the smaller one. Cut off any excess when you reach the top.
Step 8: To decorate the tree you can add some Gold Embellishing thread, some Glitter Gems, Stickles Glitter Glue, the possibilities are endless. I did die cut some stars from Gold Glitter paper and sandwiched a toothpick between 2 stars to use at the top of the tree.
I did one variation where I did not use the fringe layers and poked holes in the cone to let the light of a tea light shine through. For another variation I used patterned paper for the fringe layers instead of cardstock.
This is a fun paper crafting project to do for the holidays with endless possibilities!
Click here for the downloadable PDF of instructions. You can also watch the process video below.
So happy to share this new special from Close To My Heart! I know that we are just in December but with the months flying by and how busy the holiday season gets it is never too early to get a jumpstart on Valentine's Day! The new Now & Forever Special from Close To My Heart is perfect for this holiday.
I love the classic feel of this whole collection from the soft colors and designs to the timeless stamps. The collection features a new paper pack with coordinating sticker sheet, cardstock pack, stamp set, Thin Cuts dies, and embroidered embellishments.
Now & Forever Paper Pack
Now & Forever Paper Pack + Sticker Sheet
Now & Forever Coordinating Cardstock
Now & Forever Embellishments
Now & Forever Stamp Set
Now & Forever Stamp Set + Thin Cuts
In addition to the elements in this collection are three different bundles where you can save 20%. The Product Bundle features all of the parts of this collection plus two workshop bundles one for Scrapbooking and the other for Cardmaking. Both of these workshop bundles help you get a great start on your Valentine's Day crafting.
Now & Forever Product Bundle
Now & Forever Scrapbooking Workshop
Now & Forever Cardmaking Workshop
You can see and shop all the elements of this collection on my website today - here!
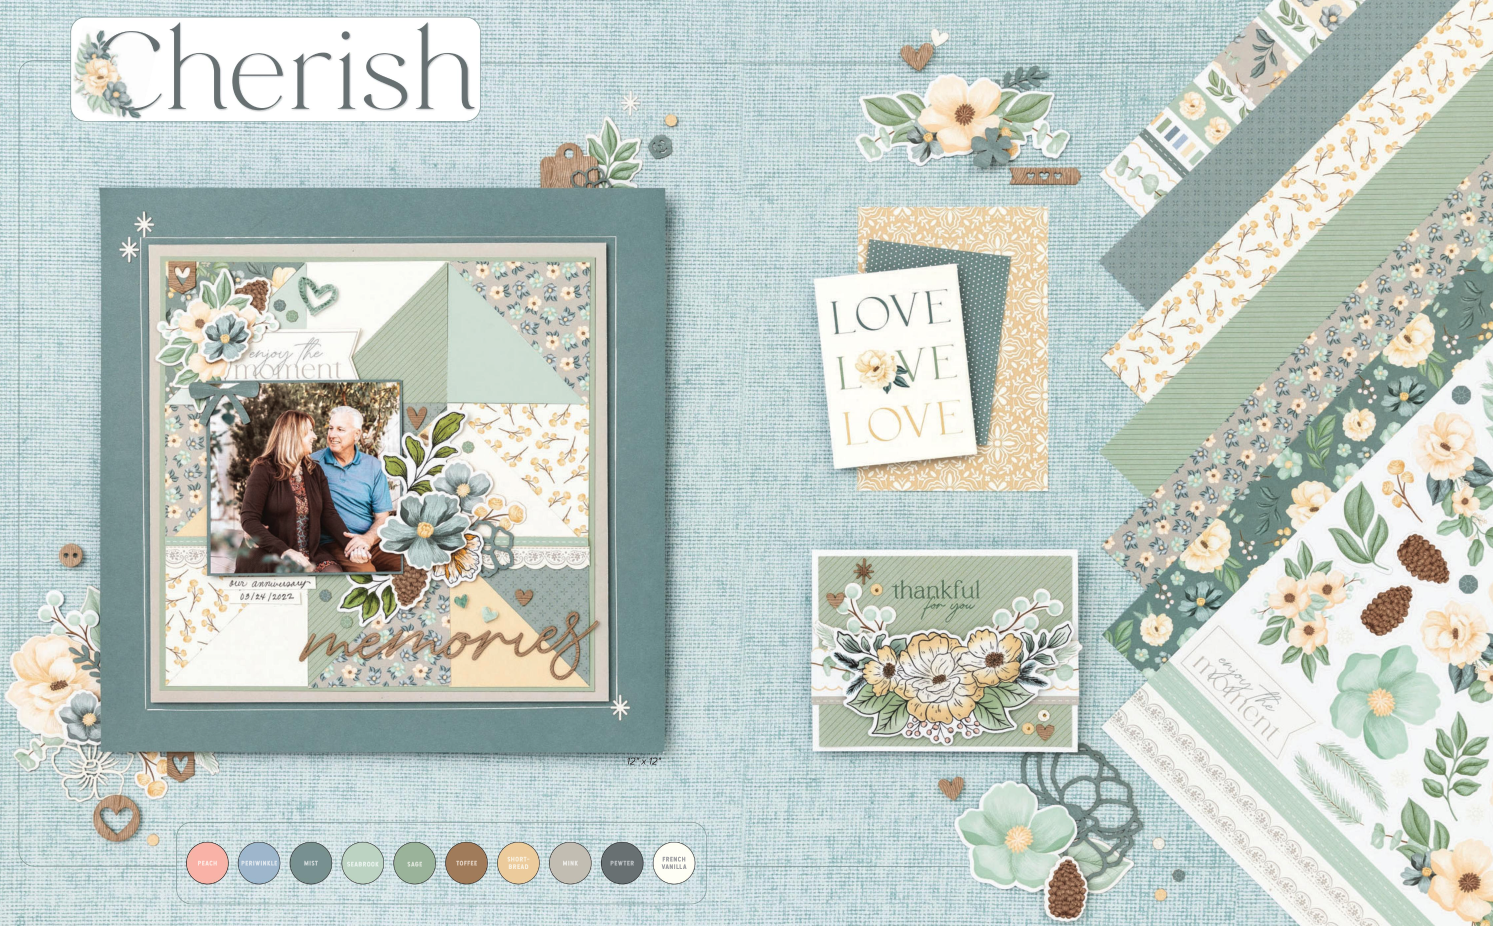
The third collection from the October/November/December catalog that I want to share with you is the Cherish collection. I love the soft colors and floral patterns in this collection. It is perfect for many crafting projects.
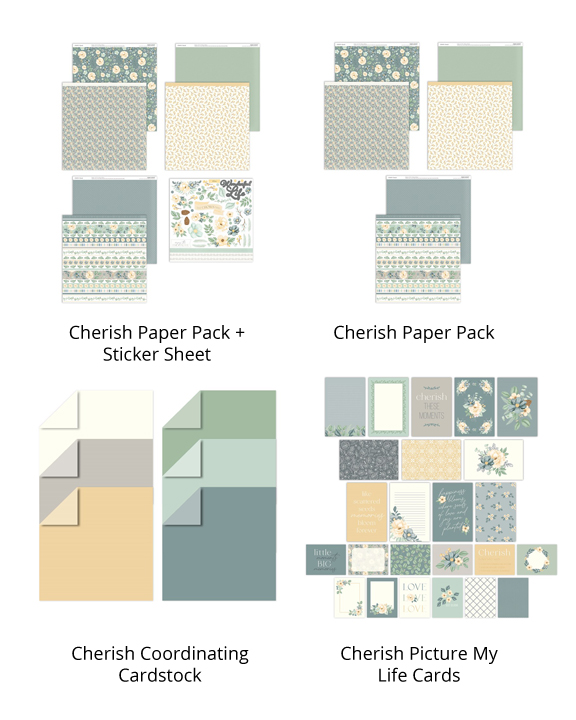
As always Close To My Heart gives some great options for a collection in their catalogs! There are 2 choices for the paper pack - each pack has 6 sheets, 2 each of 3 double-sided designs, you can choose the pack by itself or with a coordinating sticker sheet. In addition to the paper pack there is also a Coordinating Cardstock pack, Embellishments, Picture My Life Cards and a Digital Art Collection. If you are also into stamping this collection also offers a scrapbooking stamp set and a cardmaking stamp set.
In addition to the paper packs, stamp sets and embellishments, there are also 2 workshop kits available with this collection. Each workshop kit features exclusive elements that are only available through the kit. Exclusive patterned papers, printed die cuts as well as die cuts in coordinating colors in the scrapbooking workshop kit and an exclusive stamp set with coordinating Thin Cuts in the cardmaking kit.
I hope you are in love with this collection as much as I am! I cannot wait to craft with this collection and am looking forward to sharing the results with you!
You can see and shop this collection on my website today - here!